Pages

Monday, 26 December 2011

Top 5 Easy Rice Recipes on Edible Garden


Its all about eating less carbs or no carbs now, I get it. So I want to apologize for shoving these 5 rice recipes in your face but these are the most popular (pageviews popularity from Google Analytics) on Edible Garden and I wanted to list them out for you, just in case.

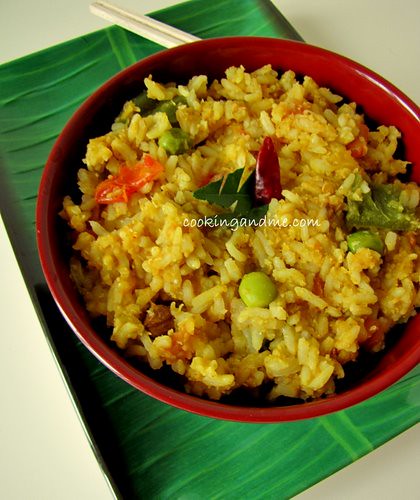
1. Easy Bisi Bele Bath / Sambar Sadam


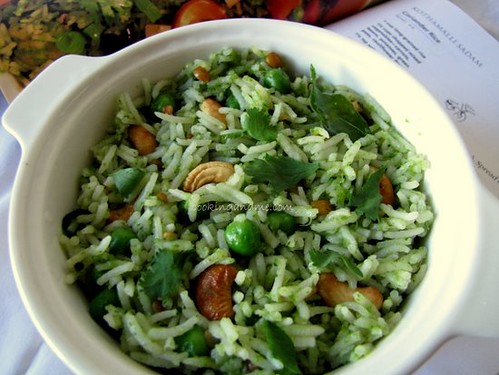
3. Coriander Rice / Kothamalli Sadam (I have received 17 emails to date from people who tried and loved this recipe)

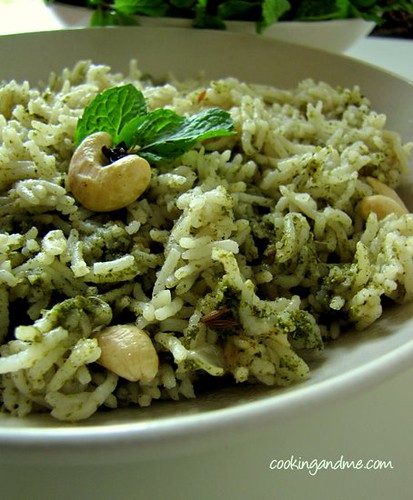
4. Mint Rice / Pudina Pulao (great way to use up some pudina leaves lying around)


5. Ellu Sadam (I love the flavour 'cuz I love sesame seeds!)


What's your favourite rice recipe? Do you like it plain or spiced up?

Mushroom Biryani / Biriyani Recipe


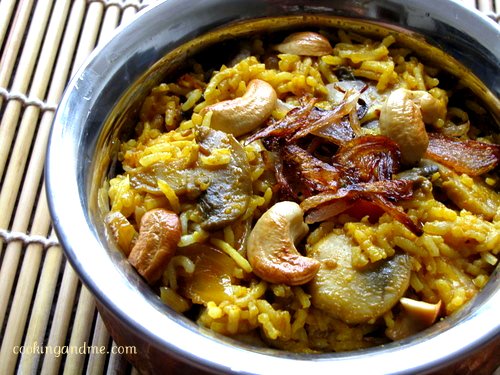
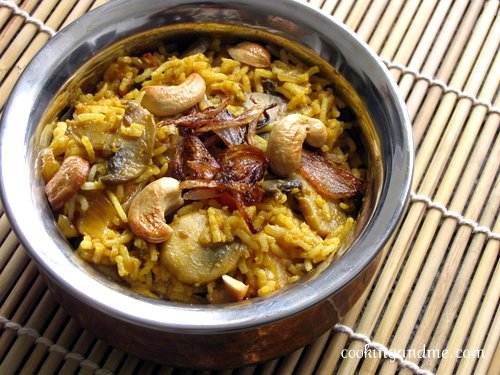
With all that talk of non vegetarian biryanis yesterday, I simply had to share the Mushroom Biryani I tried a couple of weekends back. I usually follow a pretty standard recipe when I make biryani but I opted to make this one a bit more spicy and tomato-ey than usual. We loved it and I am making some more for a potluck tomorrow.
Mushroom Biryani

Ingredients:
2 cups cooked basmati rice
1 cup chopped button mushrooms
1 large onion, sliced long
2 large tomatoes, pureed
1 tsp tomato paste (or tomato ketchup)
1/2 tsp turmeric powder
1/2 tsp red chilli powder (or to taste)
1 tsp garam masala / biryani masala
1 tbsp oil
1 tbsp butter / ghee (or another tbsp of oil)
Salt to taste

To Grind Together:
1 onion
5 green chillies
1" piece of ginger
4-5 garlic cloves
1" piece of cinnamon
3 cloves
3 cardamom pods
A few stalks of coriander leaves (optional)

For Garnish:
1 large onion, sliced long and fried golden brown
A handful of tasted cashewnuts
Chopped coriander leaves

How I Made It:

1. Heat oil and ghee and throw in the onions. When they are golden brown, add the ground masala paste. Don't worry if some of the spices are not ground fine. Mix well until nicely fried, for about 2-3 mins. Then add the chopped mushrooms.

2. The mushrooms will give out some water, so cook until the mushrooms are soft and the water has all evaporated. Then add the chilli powder, turmeric, garam / biryani masala and fry for a minute. After this, add the pureed tomato and tomato paste / ketchup. Stir well and cook well until all the ingredients come together. No need to add water at any stage. Add salt.

3. Gently mix in the cooked basmati rice and garnish with the fried onions, cashewnuts and coriander leaves.
Serve hot with raita.

Shamshad's Chicken Biriyani / Biryani Recipe


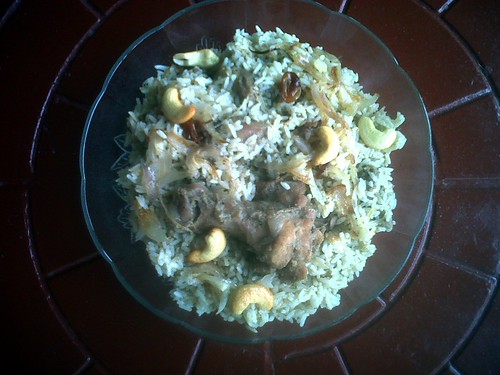
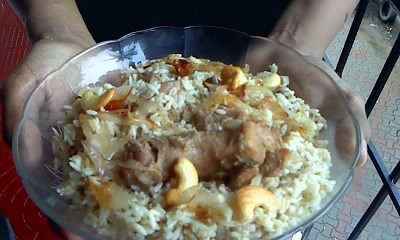
What better way to get back fully after a lazy break from blogging? Make someone else do the work. So here's a mild yet yummy and super easy Chicken Biriyani recipe shared by my friend Shamshad. She was very apologetic about the pictures but I have to say she did a mighty good job.

Thanks Sham!


Chicken Biriyani Recipe
Adapted from Awesome Cuisine
Serves 4-6

Ingredients:
Basmati rice -  4 cups (soaked in water for 1 hour)
Chicken pieces - 1 kg
Onions - 3 large
Ginger garlic paste - 2 tbsp
Green chilies - 5 (or as per your requirement)
Pepper powder - to taste
Coriander powder - 3 tbsp
Garam masala - 1 tbsp
Cardamom - 4
Cinnamon - a 1" piece
Cloves - 4
Salt to taste

To Marinate
Pepper powder -to taste
Coriander powder - 3 tbsp
Garam masala - 1/4 tsp
Salt to taste

For Seasoning
Ghee - 2 tbsp
Cashew nuts - 15 or so
Raisins - 10 or so
1 large onion

Method:

1. Chicken
Wash Chicken pieces. Marinate for atleast an hour with coriander powder, pepper powder, garam masala powder and salt.
Semi fry chicken pieces in a pan with little oil.

Heat oil and add onions and the ginger garlic paste. When it turns brown, add green chilies (cut into small pieces). Add coriander powder, pepper powder, garam masala powder and salt.

When it is done, add chicken pieces. Keep it for 5-10 mts till it is half cooked. In between you can turn the pieces so that it is heated equally.

Cook in pressure cooker with about 1/2 cup water. Normally 4 whistles.

Biriyani Rice
Put 2tsp ghee in the pan used to fry the chicken. Add cardamom+cloves+cinnamon.
After 2 mins, add the soaked rice. Stir well for 5 mins, else it will stick to the pan. Add the rest of the main ingredients and cook in a pressure cooker with 6 cups water (the ratio of rice:water should be 1:1.5) - normally 3 whistles for basmati rice.

Once done, mix the cooked rice and chicken.

Seasoning
Put ghee in a pan. Add onion (cut lengthwise very thin), cashew nuts and raisins. When it turns light
brown, remove and garnish the biriyani
Serve hot with papad and raita.

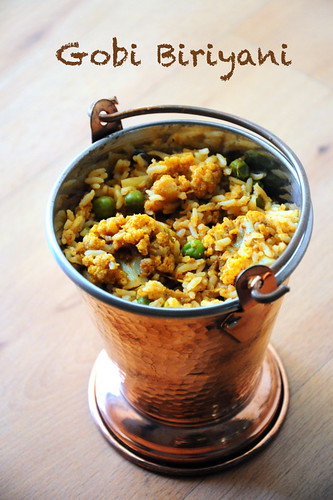
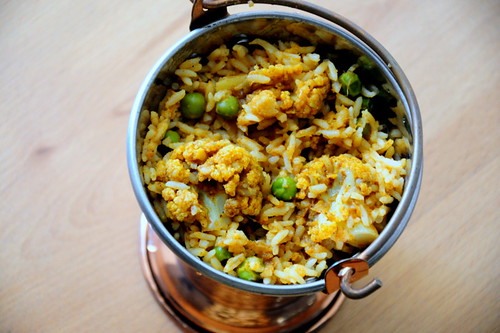
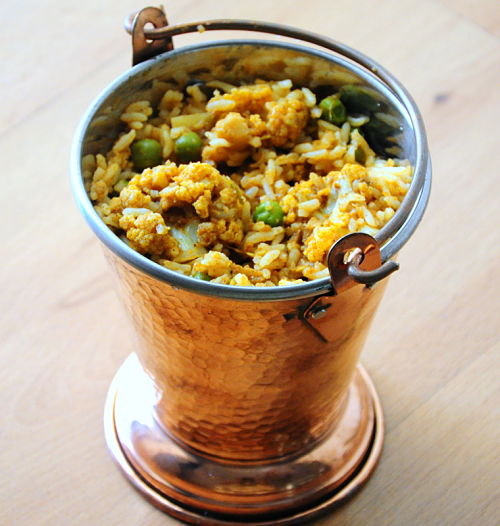
Super Quick Cauliflower / Gobi Biryani Recipe


Yes, I totally made this recipe up. There's no such thing as a Cauliflower Biriyani. No, you are right, cauliflower does get added on to vegetable biriyani occasionally there's no biriyani that's exclusively dedicated to cauliflower.

I am also going to say this up front before you read through the whole recipe and get disappointed. You need Biryani Masala to make this recipe. Its not one of those grind-your-spices-fresh type of recipe because that would make this a non super quick dish, and today we are all about super quick.

Its also a prerequisite to like cauliflower inorder to enjoy this dish.

Gobi / Cauliflower Biryani Recipe
Serves 3

Ingredients:
1.5 cups basmati rice (or any long-grained rice)
1 large onion + 2 green chillies, ground to a paste
1 large tomato, pureed
A handful of green peas (fresh or frozen)
1 medium sized cauliflower, washed and cut into florets (around 4 cups)
1 tbsp ghee (or oil)
Fresh chopped coriander leaves for garnish (optional)

The Masala
1/2 tsp jeera / cumin
1 tsp dhania / coriander powder
A pinch of turmeric
1 tsp ginger garlic paste
1 heaping tbsp of biryani masala
Salt to taste

How I Made It:

1. Cook the basmati rice in 5 cups of boiling, slightly salted water until cooked but still firm. Set aside.

2. Heat the ghee in a pan and add the onion-green chilly paste. You can also slice the onions and chillies and add it that way but I felt like grinding it so I did. Fry the onion paste for about 2 mins. It will start losing moisture and get thicker.

3. At this stage, add all the masala ingredients in the order given. Fry well for about a minute till it starts smelling gooood.

4. Add the tomato puree, peas and cut cauliflower florets. Give it a good mix and cook closed on low fire until the cauliflower is cooked soft, yet retains its shape (about 5-7 mins). You can sprinkle some water if you feel the mixture is getting too dry.

5. Once done, check salt and then mix in the cooked rice gently until well combined. Garnish with chopped coriander leaves and serve with any raita and papad.

The preparation time for this biriyani is significantly less because you are not pounding any masala last minute. Depending on what biriyani masala you use, you will get a distinct flavour each time - I love that variety!

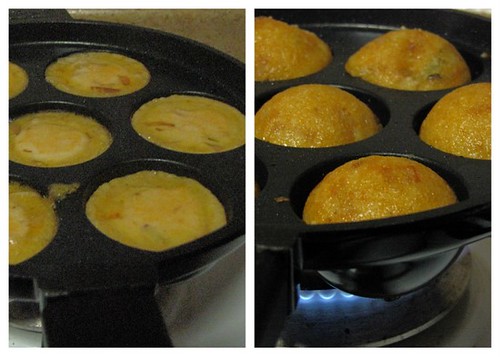
Masala Kuzhi Paniyaram Recipe

I thought I had posted this recipe yesterday but looks like I was dreaming while working - again! Anyway, here it is, my quick fix masala paniyaram recipe that gets made each time I have leftover dosa maavu. Originally part of the Chettinad Cuisine, its quick to prepare, easy and a very nice snack for evening tiffin. I love Chettinad recipes! Their love for food shows in their recipes, I feel.


You will need a paniyaram chatti/aebleskiver pan to make this, unfortunately, so if you don't have one yet, please do something to fix the situation ASAP.


Masala Kuzhi Paniyaram Recipe
Preparation time: 15 mins

What I Used:

Dosa/idli batter - 3 cups
Onion - 1, minced
Green chillies - 2, sliced round
Halved urad dal/split black gram/ulutham paruppu/uzhunnu parippu - 1 tsp
Red chilli powder - 1 pinch (I add it for the colour)
Hing/asafoetida/kaayam - a generous pinch
Greated coconut - 1 tbsp (optional)
Curry leaves - a few, torn into small pieces (optional)
Salt - to taste
Oil - 2 to 3 tbsp

How I Made It:

1. Mix all ingredients except oil into the dosa batter.

2. Heat the paniyaram chatti and add 3-4 drops oil into each hole. Once it heats, add spoonfuls of batter into each hole until its more than 3/4th full. Let it cook until the bottom is browned and crisp.

3. Turn over and cook the other side. Make sure that the stove is at medium-low so that the inside also gets cooked without burning the outside.

4. Once both sides are brown and crisp, drain on a kitchen napkin.


Serve hot with chutney and hot tea/coffee

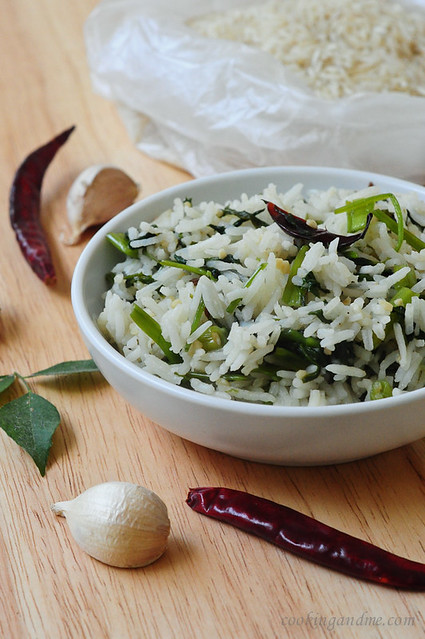
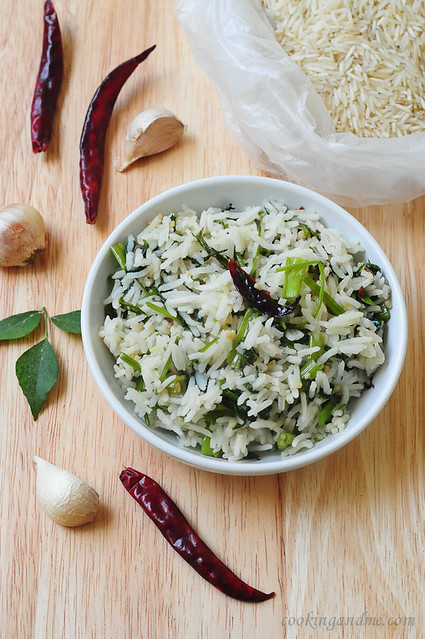
Garlic Flavoured Kang Kong Rice Recipe


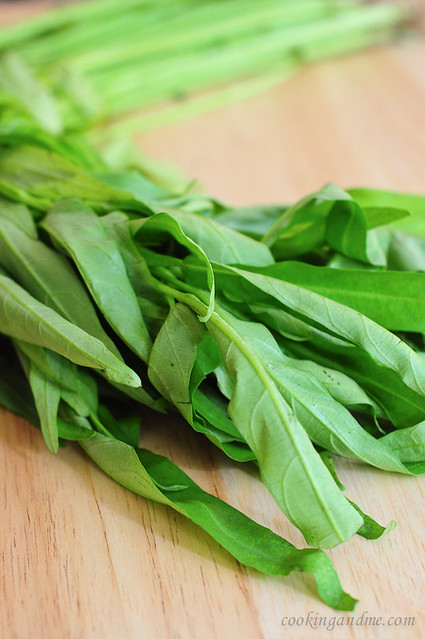
I made this a couple of months back to serve with the Banarasi Dum Aloo. When I posted a teaser of these dishes on my Facebook Page, a lot folks wanted to know what kang kong is. Its not easily available outside of Asia as far as I know but there's this dish called Sambal Kang Kong that I fell in love with during my first few Singaporean Malay meals in Singapore. Sambal is not vegetarian since it contains anchovies (although vegetarian versions do exist, it's not the real thing) and I haven't seen kang kong being used in any way but steamed or stir fried and served with spicy sambal.'


This could be because kang kong lacks any strong flavour of its own. Anyway, I was determined to try and vegetarian recipes with kang kong and knew it had to be paired with something that was spicy and had a strong flavour. Garlic seemed like a good choice in the flavour department. 

Garlic Flavoured Kang Kong Rice Recipe

Ingredients:
1 small bunch of kang kong, washed and roughly chopped 
1 cup  of cooked Basmati rice 
3 flakes of garlic, minced 
3-4 of dry red chillies, torn into halves 
1 tbsp of oil 
Salt to taste 


How I Made It:

 1. Heat a pan on low heat and add oil. When it warms up, add the minced garlic and fry for a minute. When the garlic turns fragrant, add the red chillies and fry again until they start to glisten and turn shiny. 

 2. Add the chopped kang kong with some salt and cook on medium flame until it gives it some water, and cooks in it. The leaves will begin to wilt and shrink - about 5-7 mins. 

 3. Add the cooked rice, mix well, heat through, and remove from fire. 

 Serves 2 : About 2-3 cups


In hindsight, adding some spicy sauce to the rice mix would have added a lot more punch to this, like maybe some Thai red curry paste, or a blend of green chillies+coriander leaves+mint leaves, etc.

 Cooked this way, its a bit bland but went really well with the Banarasi Dum Aloo.

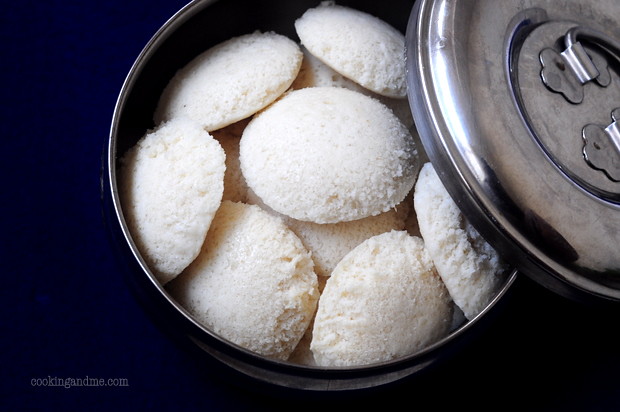
Murugan Idli Kadai Idli Recipe


It's time for another Free-Spirit Bloggers post! Time sure flies and each time I post something for a monthly event, I realise that even more.

 The theme for this month's was picked by Siri and she wanted us to cook up something that we had tasted and loved in a restaurant. It has to be a main course dish too. Although this seems easy enough to do, I had to think long and hard. There were quite a few dishes that fit the description of course but admittedly, most were not vegetarian and FSB is a vegetarian group :D

So I put on my thinking cap and the bulb lit up finally. TH and I both love Murugan Idli Kadai and particularly their masala dosa. Although neither of us are huge idli fans and hardly ever touch thing when our mothers lovingly make them, we do sometimes get a bit nostalgic about them when in Singapore.


Anyway, back to the story. When we were in Murugan Idli Kadai one evening gorging out on masala vade and masala dosa and some idli too just for good measure, the main cook came out to talk to the manager about something. Then he came by and smiled at us and said "chutney venuma?" (would you like some chutney?). I said "vendaam" and after a pause "idli romba super aa irukku, idhukku entha proportion-le arisi uluthamparuppu arappeenge". (No thank you. Btw, your idlis are superb, what proportion of rice to urad dal do you use for the batter). 

 Now I don't need to tell you that this question is quite cheeky. Its almost like going into KFC and asking what goes into their fried chicken crust. But surprisingly, the cook didn't even hesitate before saying "veettule pannaa namma arisi jaasthi poduvom. naange inge pannumbothu ulutham paruppu konjam jaasthiya poduvom, athuthaan ungalakku nalla soft idli tharum. 2 glass arisi edutheenganna oru glass ulutham paruppu podunga. appadiye, oru chinna spoon menthayam, apram oru pidi soru. correct aa varum"*

 This was the first time I was hearing about adding cooked rice to the idli batter but who was I to argue with the chef at Murugan Idli Kadai. I nodded happily, came home, and forgot all about it.

Eventually, my memory did kick start again and I tried idli as per his recommended recipe. It was strictly average. Then I tried again and the second time, it came out brilliantly. 

 Although this is actually a secret recipe, I am going to share it with you anyway!


Murugan Idli Kadai Idli Recipe

Ingredients:
2 cups  of par-boiled ponni rice 
1 cup of whole, husked urad dal / ulutham paruppu / uzhunnu parippu 
1/4 tsp  of fenugreek seeds / menthayam / uluva 
A handful of cooked rice 
Salt  of to taste 


How I Made It:

 1. Soak the rice and dal separately, the dal for about an hour and the rice for about 4 hours. Add the fenugreek seeds to the urad dal while soaking. 

 2. Grind the urad dal first, with just enough water to grind it to a smooth paste. Once done, remove and set aside. 

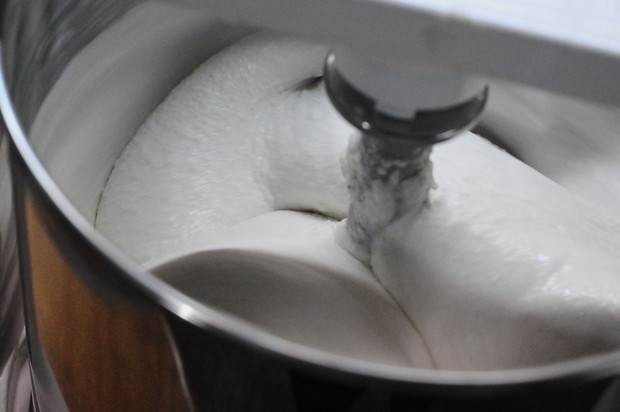
 3. Next, grind the soaked rice. When its almost done but still grainy, add the cooked rice and salt. Grind until smooth and add to the already ground urad dal. 

 4. Fold together until well combined. Leave in a warm place undisturbed for atleast 8 hours or overnight. Leave enough room in the vessel for the batter to ferment and rise. 

 5. Once fermented and risen, mix well to let all the air bubbles to escape and the batter to come together well. Don't overbeat, and if its too thick, add a little water. For idlis, the batter should be slightly thick but of pouring consistency. 

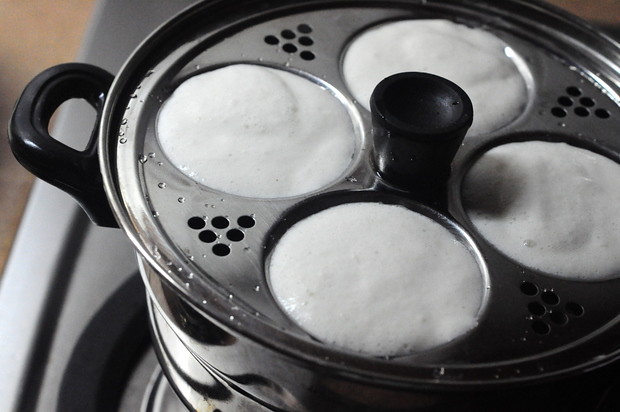
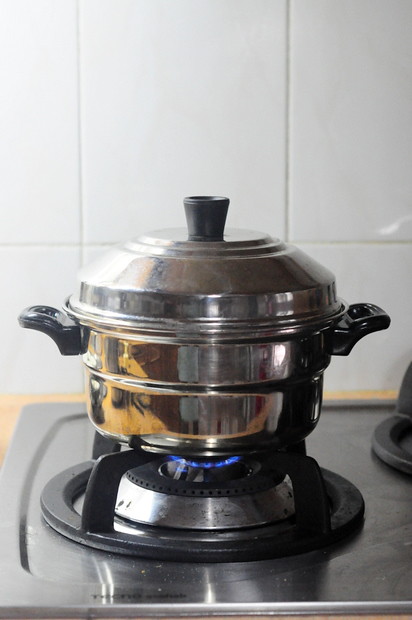
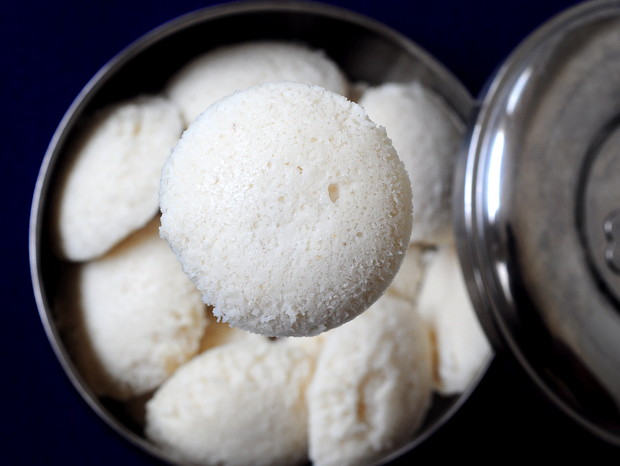
 6. Pour into oiled indli moulds and steam for not more than 12 minutes. Overcooking idlis can result in very hard idlies and a dry crust on top. Its better to undercook them even, but make sure you don't overcook idlis.


Serve hot with chutney and sambar. 

Makes about 20 idlis


Notes:

 - the urad dal : rice proportion is always debatable. Although this recipe seems like the equation is very skewed, the idlies came out super well for me. If the quality of your urad dal is very good, you can get away with adding more rice.

 - I made dosa with this batter the next day and they turned out ok but I would prefer more rice in my dosa batter. This works better for idlis.

 - Make extra idlis, store in the refrigerator and microwave with some sprinkled water on top. Serve immediately.

 * the translation for that roughly is: when we make idlis at home, we tend to add more rice. Here, we add more urad dal. The proportion is 1:2 and I also add a small spoon of fenugreek seeds and a handful of cooked rice. Try this, it will come out well
Related Posts Plugin for WordPress, Blogger...